 |
HELP FILES
|
FAQs
|
Tutorials
Components
ERP
|
|
How do I add a new page?
|
|
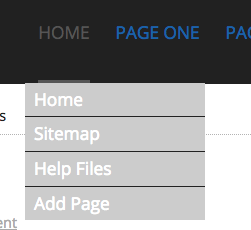
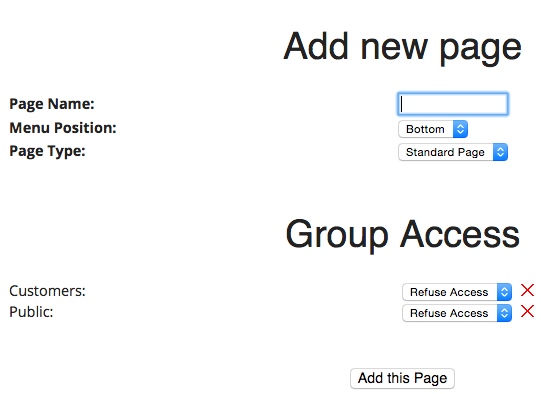
Use the menu to navigate to the area of the website where you want the page to appear. At the bottom of the menu for that section you should see a link to 'Add Page'. Click on 'Add Page' and you will be taken to a page where you can give the new page a title (what will appear in the menu) and control who has access to the page. Then click 'Add this Page'.
|
|
Back to Top
|
How do I control who can see a page?
|
|
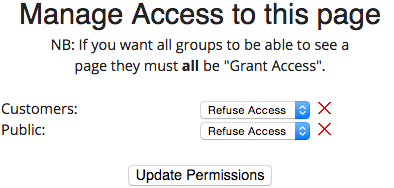
Each regular page in your website has a 'Permissions' button on the control panel that will help you manage what groups can see pages on the site. Click this button to open a new window that will allow you control access. To ensure public users of the site can see a page you must make sure the 'Public' group has access to the page. Access is based on group membership and anonymous users are members of the Public group by default.
|
|
Back to Top
|
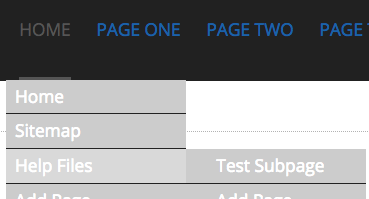
What does adding a subpage do and how do i add one?
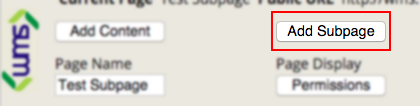
Subpages are added in the upper menu of the WMS by pressing the add subpage button, do this when you are on the page you would like to add a sub page to.
|
| Adding a subpage creates a section that will appear as a new menu when the current page is rolled over in the menu.
|
Back to Top
|
| |
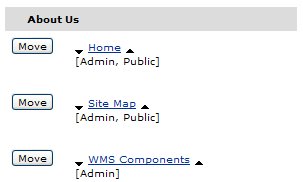
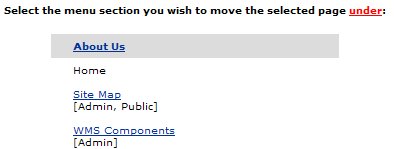
How do I move a page?
|
|
Navigate to the 'Sitemap' page. You should see buttons called 'Move'. Find the page you want to move and click it’s 'Move' button. This will open a new window showing you places where you can move your page to. Click the link for the page you want to move your page under.
|
|
Back to Top
|
WMS Content Editor
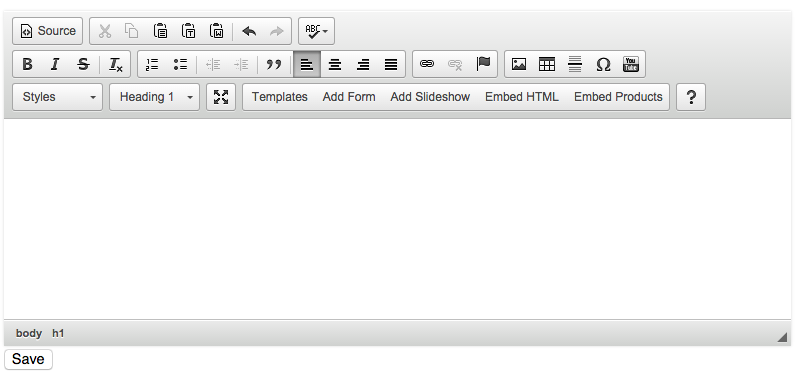
Figure 1.1 Kook Multimedia Content Editor
Figure 1.1 shows the Kook Multimedia WMS Content Editor. This is where all adding and editing of text will occur. It is a simple interface similar to Microsoft Word. This tutorial is designed to explain some of the more advanced features of the Content Editor.
Back to Top
Adding an image
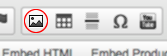
Figure 2.1 Insert Image Button
Clicking the button illustrated by Figure 2.1 will open the 'Image' window (Figure 2.2). From this window you can change all the properties for the currently selected image or alternatively insert a new one if no image was selected.
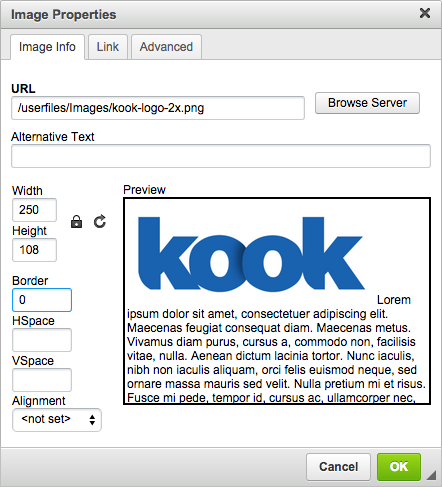
Figure 2.2 Image Window
The 'Current image path' is the location of the image on the web server. This can be changed by manually typing in the location or alternatively browsing to the location and selecting the file. Browsing to the file will eliminate any chance of human error and will also verify that the image is there.
Figure 2.3 Browse Server
If the image is already on the web server then click the 'Browse Sever' button. (Figure 2.3) This will bring up the window 'Image Browser', pictured in Figure 2.4. This window allows you to view each image currently on the server. When you have found the image you want, click the 'OK' button. This will take you back to the Image Window. You will now see the image you have selected in the preview box.

Figure 2.4 Image Browser
If the image is one that you have not used before and is located on your computer then use the upload image box. This location may also be entered manually or by browsing. To browse click the 'Browse...' button. From here navigate through the folders and select the image you wish to use. Click the 'Open' button. If this is the image you want, click the 'Upload' button.

Figure 2.5 Uploading a File
The image description is very important. Search engines use image descriptions to determine the relevance of an image. If you enter a good description of the image, search engines will give your page a better ranking. Be sure to add one. The description is also the same text that will appear when you hover your mouse over the image. These description tags are also used to help blind people to use the Internet. Special browsers designed for the blind will announce the text and image description on a web page.
The height and width of the image can be changed by inserting the desired value in the respective boxes. This value is measured in pixels. If the ratio lock box is ticked, then changing one value will change the other to match the image ratio. This means that the image will not be stretched creating an unwanted effect on the image. Click the 'Reset Size' button to change the image back to its original size.
The border property creates a border of the specified width the entire way around the image. The width is measured in pixels. The effect of the border property is depicted in Figure 2.6.
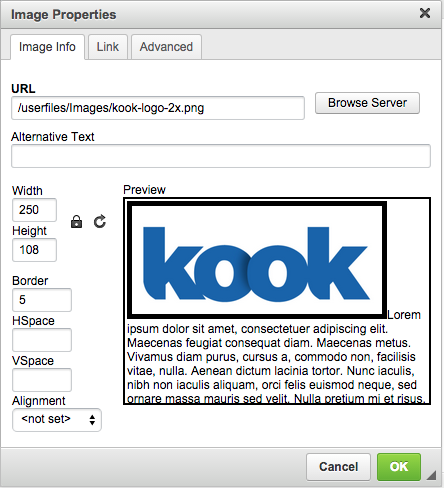
Figure 2.6 Border
'VSpace' and 'HSpace' are short for Vertical Space and Horizontal Space, respectively. This is how close any other element can get to the image. It creates a 'bubble' around the image that no other object can venture into. The effects of VSpace and HSpace are depicted in Figure 2.7.
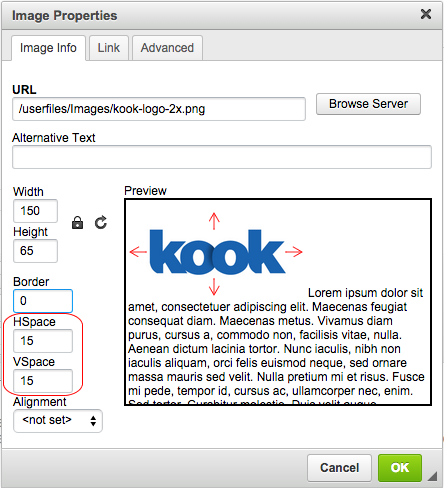
Figure 2.7 VSpace and HSpace
The align property tells the Internet browser where to position the image on the page. Luckily there is sample text wrapped around the image so that you can see the effects the align property has on the text as well. The best thing you can do is experiment with the different alignment options until you find the effect you desire.
Back to Top
Inserting a hyperlink
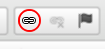
Figure 3.1 Insert Hyperlink Button
A hyperlink is what you click on to go to another page. It can be on either text or an image. The first step is to select the text or image that you wish to make into a hyperlink. Next click the button highlighted in Figure 3.1. This will bring up the 'Add Link' window (Figure 3.2).
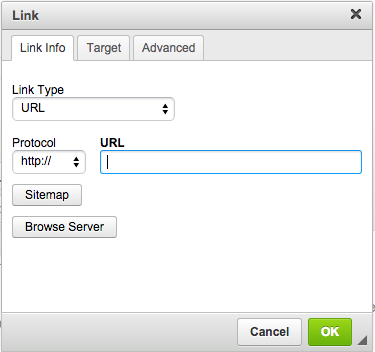
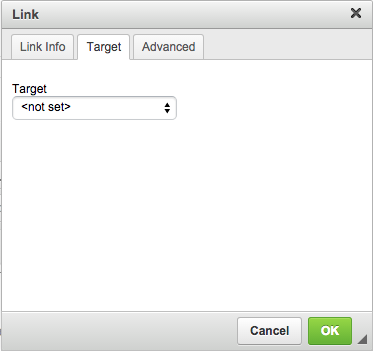
Figure 3.2 Target Window
There are four different options for a link and these are set in target window. It can link to a website, email, an existing file or a file on your computer that you wish to upload. For the first two options you use the top input box. Into this box you can insert the web address of a website you wish to link to.
Alternatively you may insert mailto: followed by an email address, to create a link that will open the users default email program and insert the email address into the 'to' box. When creating these mailto: links it is always a good idea to make the link the actual email address that you wish to send the email to. (eg. mailto:test@server.com should be inserted on the text test@server.com) Doing this makes it easier for users of http mail services (eg. Hotmail or Yahoo). The WMS will automatically convert any email addresses entered, into a mailto: link. Therefore you should rarely use the mailto: in the link window.
The second section of the page is used to link to existing files or upload a file to the server to link to. If the file is not already on the server and is on your computer click the 'Browse' button, navigate to the file you wish to upload and click 'Open'. When you are back to the link window, click 'Upload'.
Figure 3.3 Select Existing File
Figure 3.3 shows the window that will appear when you click the 'Link Existing File' button. This is the button that you click if you have uploaded the file previously (i.e. this button will show you all files already on the server). Click the one you want to link to.
Once you have determined which file or email the hyperlink is to link to you must select the Target. This is where the file linked to is going to appear. Use the <not set> option for any link except those that are links to an external site or .doc or .pdf files. In this case use the New Window (_blank) option.
Giving the link a description will archive the same as the image description and is highly recommended.
When you set all the properties for the image, click 'OK'.
Back to Top
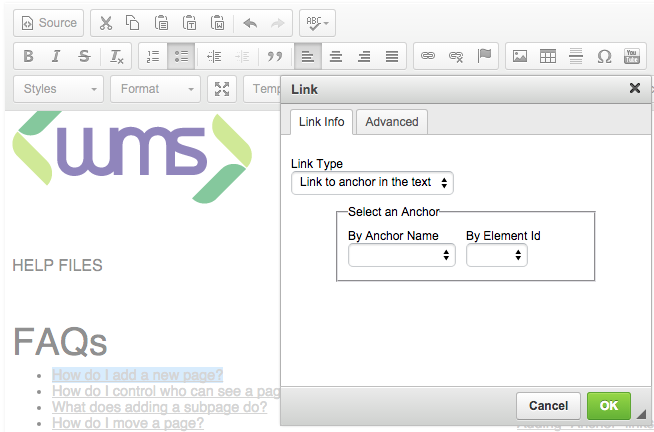
Adding 'Anchor' links
'Anchor' links allow you to make links to a particular part of a page. For example: if you have a large piece of content you may put the headings you are talking about at the top of the page and have links that allow the user to jump down the page to the topic they are interested in. These links within a page are called Anchor links.
To create an Anchor link first highlight the text that you want to make a link at the top of the page and click the 'Insert/Edit Link' button. Instead of typing the web address as usual simply type a hash ('#') and then the link name; eg: #linkname. Then go down the page an click in the content where you want the user to jump to when they click the link at the top of the page. Now click the 'link' button in the toolbar and select the 'achor' type in the link name.
Back to Top
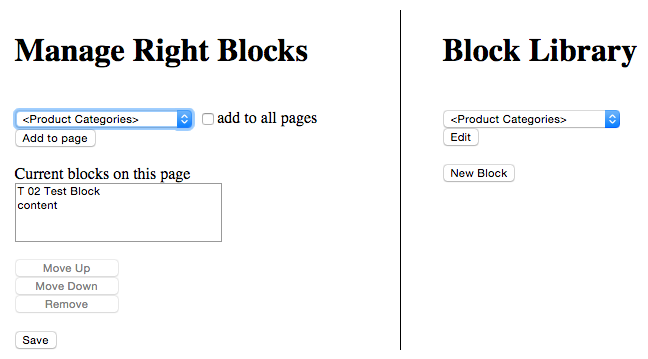
What are blocks and how can i use them?
|
|
Blocks are useful tools that can displayed (regularly) on the sidebar of your pages, they allow you to place extra content and in many cases flesh out your website. Blocks are like “Library items” if you change the library item, it changes everywhere within the site. There are Left, Right. Top and Bottom Blocks available within the WMS. Not all sites have them turned on. If you think you need blocks and cannot get them to work as expected get in contact.
Let's look at how to put in a right block, start by selecting manage right blocks from the top menu

from here you'll be taken to to block selection screen, where you can chose a prexisting block to put a page, create a new content section for your blocks, re-arrange pre existing blocks and add blocks to all pages, If you use the Add To All Pages feature, it will not add the block a second time, only to any pages without the block already existing although please be warned there is a not an undo feature for Add To All Pages. They will be need to be removed individually from each page. Alternatively give us a call and we can remove them within the database.
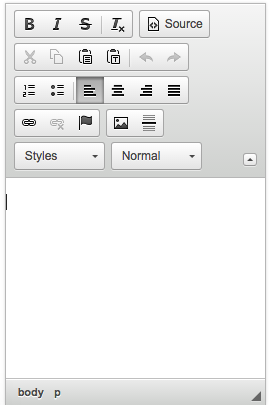
If you were to create a new block using content, you will taken to a small version of the WMS content screen, the formating will be windowed but you can click on the small arrow in the top right hand corner and reveal all formatting features.
|
|
Back to Top
| |
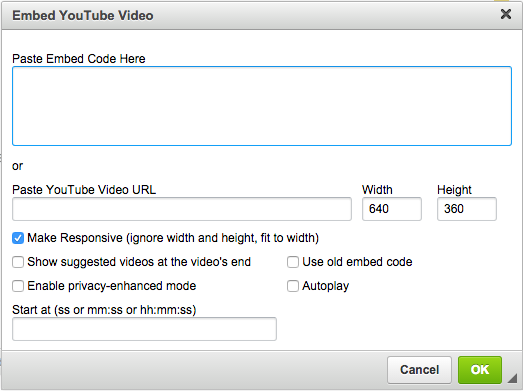
How can i put a youtube video on my page?
|
|
Youtube videos are simple to add to any page by using the youtube button, from there you will be able either drop in an embed code from youtube or even simpler drop in the URL, we also allow you to specify the time in the video you'd like it to start playing from.

|
|
Back to Top
|
|
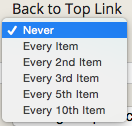
What is a 'Back to Top' link?
|
| Clicking on the 'Back to Top' link takes the user to the top of the page currently being viewed. There is an option in the control panel of each page that allows you to add Back to Top links to your pages. You may not wish to have a link on every record. The dropdown box allows you to select how often the Back to Top link appears.
|
|
Back to Top
How can i prevent my content from errors when creating new content?
|
| When your creating new content we recommend creating a drafts page, this page is hidden and won't be visible to the public so you're free to have as many errors as possible. Having this page will assure that when your content is at it's best you can just copy and paste the content that is working perfectly. If you want to work on previous content before you post it to the public to assure all the errors are worked out draft pages are a great way to do it. |
Back to Top
|
|
How can I make a page invisible without losing the data?
|
| If you want to keep the data on a specific page but don’t want it visible to the public then you can simply change the page permissions to refuse access to all groups. This effectively makes the page 'Admin Only'. This means it will no longer be available to people not logged in as an administrator, effectively making it invisible to the public. See the FAQ for How do I control who can see a page? for details. |
Back to Top
|
What is the 'Content Display' option?
|
|
Usually reserved for news or product pages, the Content Display option in the Administrator Control Panel changes the way information is displayed. If 'All Content' is selected, then every record will be shown. By selecting 'Preview' a small amount of text will be shown along with an option to >>read more>>. When the link is clicked the entire record is shown.
|
Back to Top
|
What is the 'Records per Page' option?
|
| This is the number of records shown on a page. If the number of records in this section exceeds the number specified by this option then the section is split up into multiple pages and a link is added to the bottom of each page that allows you to move through each batch of records at the click of a button. |
Back to Top
|
What is a Record?
|
| When you click 'Add Content' a new record is created. The advantage of having multiple records is that you can link to a specific point on the page from another page (also known as an 'Anchor Link'). It also allows the use of Back to Top links and the Content Display option. |
Back to Top
|
Why do I need a page name or a title in my records when adding content to the site?
|
|
The page name is used for a number of purposes, including:
- it is shown in the title bar of the page, i.e. the blue bar across the top of your browser
- when you are creating other pages and you wish to link to the current one, it will be what you reference the page by
- this is what references all the pages in the site map
- in search engines such as Google, this is the text that appears in the link
For these reasons it is important you give the page a meaningful name to make it easier for yourself and your site’s users.
|
Back to Top
|
How do I add 'News' items to my site?
|
|
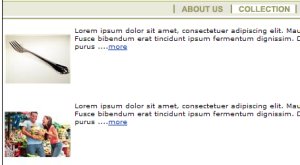
When you are adding a page to your site you can specify what type of page it is. Select 'News' from the list of Page Types. When you have created the page you can then add news items to the page. The 'Content Display' option on the control panel will determine if all of the news item is shown or whether you show a smaller image and a short introduction to the story with a '...more' link to then show the full story. Select Preview from the Content Display option to show the abbreviated version and select All Content to show the full stories. News items can have a headline, an image and the story text.
Preview version Full Version
|
|
Back to Top
|
How do I create a slide show?
|
|
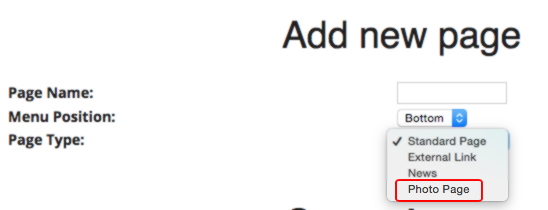
The First thing you have to do is create a page to host you're slide show, you can do this by simply creating a new page and assure that the page type is photo page,
You will now be able to upload photos and images to this page and this will create a gallery which will form what images are shown in your slideshow.

the next step is to go to the page you'd like to add your slideshow, and use the add slideshow button

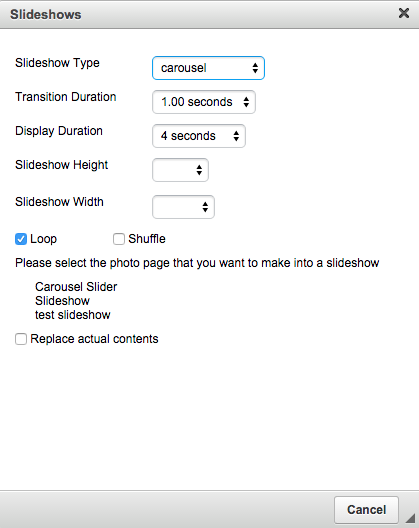
from this point you'll be able to choose the slide show you'd like to feature, the dimensions of the slideshow, the way you'd like it to transiton and the duration for each image and transition, along with if you'd like the slideshow to loop or shuffle.
|
Back to Top
|
Why can’t I edit some pages?
|
| Some pages in the <WMS> are individually coded by the Kook Multimedia programmers and developers. These pages cannot be edited because it may destroy programming code. |
Back to Top
|
Why does hitting enter put in 2 new lines?
|
|
When you press Enter on your keyboard the Content Editor will create what is known as a paragraph break. This is equal to two line breaks. If you wish to simply add one line break (i.e. a new line) rather than inserting a paragraph break, hold down the Shift key while you press the Enter key.
|
Back to Top
|
Why does my picture look fuzzy?
|
|
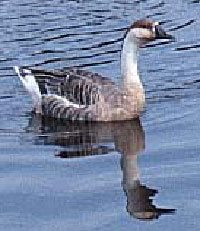
This is usually caused by enlarging a photo to be bigger than its original size. Images can be reduced in size without the image losing quality, but if you upload an image and enlarge it the computer has to 'make up' data and the image may become fuzzy. The best advice is to avoid enlarging images.
Original
|
Stretched
|
 |
 |
|
Back to Top
|
How do I find broken links?
|
|
Under the 'Website' menu option you should find subpages that include 'Link Checker'. Navigate to this page and you will be presented with a table of results that shows the links with in your site that have been created using the WMS. This page does not check links that you have made to pages outside your site. If a link is broken (i.e. that page no longer exists) it will be shown clearly.
|
Back to Top
|
How do I get rid of the lines on tables?
|
|
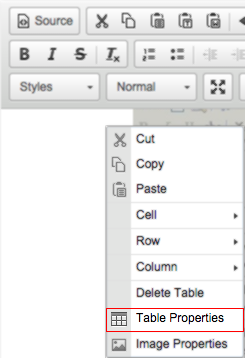
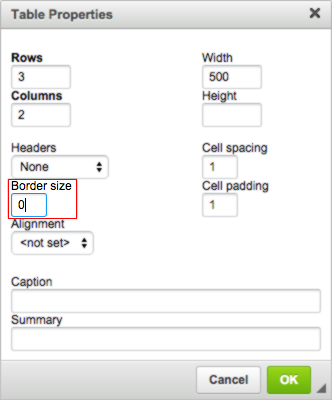
The editor usually creates tables with a border size of 1 by default. Changing this to zero will hide the table borders. This can be done either when the table is first created or after it has been finished. In both cases in the 'Insert/Edit Table' window change the border size to the number zero. To bring up the 'Insert/Edit Table' window after a table has been created, right click inside the table and select 'Table Properties'.
|
Back to Top
|
How do I wrap text around a picture?
|
|
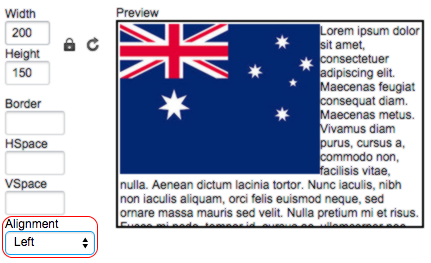
When you click on the 'Insert/Edit Image' button, you will find in the 'Image Properties' window an 'Align' drop-down menu. By selecting either the 'Left' or 'Right' option the image will be moved accordingly, and the text will wrap around it.
|
Back to Top
|
What is a site map?
In the site map you can change the order of the website’s navigation menu. This is done by clicking the arrows with respect to the direction you wish to move the item in the menu.
Back to Top
How do I move a Record?
If you wish to move a Record, navigate to the current location of the Record and click the 'Edit' link. At the top of the page is a drop down menu with a list of possible places to move it. Select the place you wish to move it to, then click the 'Move' button. Note: Records can only be moved within the same drop down menu and not between them.
Back to Top
Pasting from external sources (eg Microsoft Word)
When pasting data from external sources, such as Microsoft Word or other web pages, you must click the 'Paste' button (Figure 4.1) if you wish to retain the text formatting. This is the font size and colour etc.
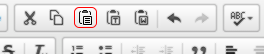
Figure 4.1 Paste Button
If you do paste data and want to remove the formatting utilise the Remove Format Button, and this will allow the formatting and styling to conform to the rest of the page
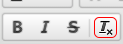
Figure 4.2 Remove Format Button
You cannot directly copy an image from an external source to the Kook Multimedia WMS Content Editor. You must upload them using the previously mentioned method.
Back to Top
|
Member Manager
|
|
Management of users and groups is performed through the 'Member Manager' page (found as a subpage of 'WMS Components'). Access to many functions of the WMS is controlled by group membership. If a group has been granted access to a page, members of that group should be able to view that page (See How do I control who can see a page?). Member only content is accessed via a username and password system. Users of the system should be members of a group to access this functionality. With the 'Member Manager' you can:
- Add new groups
- Add members to a group
- Create new members
- Edit group and member information
- Activate or suspend users
To edit group information click the 'Edit Group' link on the 'Member Manager' page. To edit users or create users click the 'Edit Members' link on the 'Member Manager' page. NB: When users are first created they are 'Suspended' by default. This is a security precaution. Suspended users cannot log in to the system. To activate a member click the 'Edit Members' link and a table of users from that group will be shown. Find the user to activate and click the 'Activate' link. If you need to suspend a member click the 'Suspend' link on the same page.
|
Back to Top
|
Photo Gallery
|
|
To add a photo gallery to your site click the 'Add Page' link in the menu where you want your page to appear. Give the page a title as usual but make sure you select 'Photo Page' as the page type. This will add a special page where you can upload photos/images. When you are in the 'Admin' side of the site there will be a button that allows you to browse to the location on your computer where the images are located. You can then upload the images to the website by clicking the 'Upload' button. When images have been uploaded a thumbnail will appear in the body of the page. Clicking on the thumbnail will open a new window allowing the user to see the full sized version of the image. In the 'Admin' side of the site there will also be links to delete the image if required. The thumbnail images are optimised by the WMS to reduce file size and therefore the photo pages will load much quicker than if the original images were used.
|
Back to Top
|
Email Component
|
|
To send email to users of the system click 'Send Newsletter' (a subpage of 'WMS Components'). You can send emails to a group or a number of groups and you can select specific recipients or all members of a group. If required you can also add individual recipients if they are not currently members of the system. There are step by step instructions on the 'Send Newsletter' page. NB: Remember to select recipients before composing your email as clicking the 'Find Recipients' button clears the editing window.
It is possible to track certain statistics about the emails you send out using the system by using the 'Email Reporting' page (a subpage of 'WMS Components'). Events you can track include: the number of emails sent, how many failed, how many were opened, how many people visited the site from links in the email, what pages the users entered the site from etc.
|
Back to Top
|
|
ERP
|
Products and Categories
Normally you use the Product Manager accessible from the Home / WMS Components sub-menu to create, edit and delete products and categories.

Product Images
You can upload as many images for a product as you like. If you want to upload product images or change other product properties (e.g. name, price), open the Product Manager accessible from the Home / WMS Components sub-menu. Use the tree-like categories menu to locate the product category and click that category. Scroll the page down and click the product you want to edit.

Product Prices
You can have more than one price per product. For example, you may offer lower prices for wholesale customers. You can also have prices in different currencies.

Promotional Products
Usually all the products in the system have the same layout (font size and colour, background colour, etc). If you want to "highlight" a product, you may mark it as "promotional". Such products are rendered differently (larger font, bright colours).

Related Products
If you have products that are closely related (e.g. a photocamera and films), you can use the Product Manager to create relations between them.

Related products are displayed along with the original products to encourage your customers to buy more.

Freight
Depending on your business model you can use different freight calculation rules. For example,
- flat freight amount;
- freight per product;
- freight based on the delivery address and order total cost

Importing Data
If you use any accounting software (e.g. MYOB, Pastel), you can export data from your internal sysem and then upload it to the web site either manually or automatically.

|
Back to Top
|
|
|